In case you are promoting your MacBook or Mac, trading it in, or simply passing it on to pals or household – you’ll be smart to wipe the Mac and restore it to manufacturing unit settings first. That is partly in order that your information stays secure, however it would additionally keep away from any points at a later date that might come about in case you don’t disconnect that Mac from varied providers and software program you may use. It additionally means the brand new person can restart the Mac as if it was model new.
Simply do not forget that if somebody goes to be utilizing the Mac after you, eradicating private info alone isn’t sufficient – you additionally want to ensure there’s a working model of macOS put in afterwards. Learn our guide to selling a Mac.
One more reason why you may need to wipe your Mac is to carry out a clear set up of macOS – which could be a good solution to repair points along with your Mac if it’s beginning to behave oddly or you’re worried you might have a virus. Wiping a defective Mac will mean you can set it up like a brand new Mac – which is able to hopefully repair any software-related points you’re having.
First a bit of excellent information: In case you have macOS Monterey or in a while an M1 or M2-series Mac, or a Mac with a T2 chip, the method for erasing the content material in your Mac is far simpler than it was once due to an possibility in System Preferences/System Settings. We’ll run via the brand new steps under earlier than shifting onto the extra difficult technique you’ll want to make use of on older Macs.
Comply with our information to do the next:
- Again up your Mac.
- Erase all of your information out of your Mac.
- Restore your Mac to its manufacturing unit settings.
- Reinstall macOS.
Again up your Mac
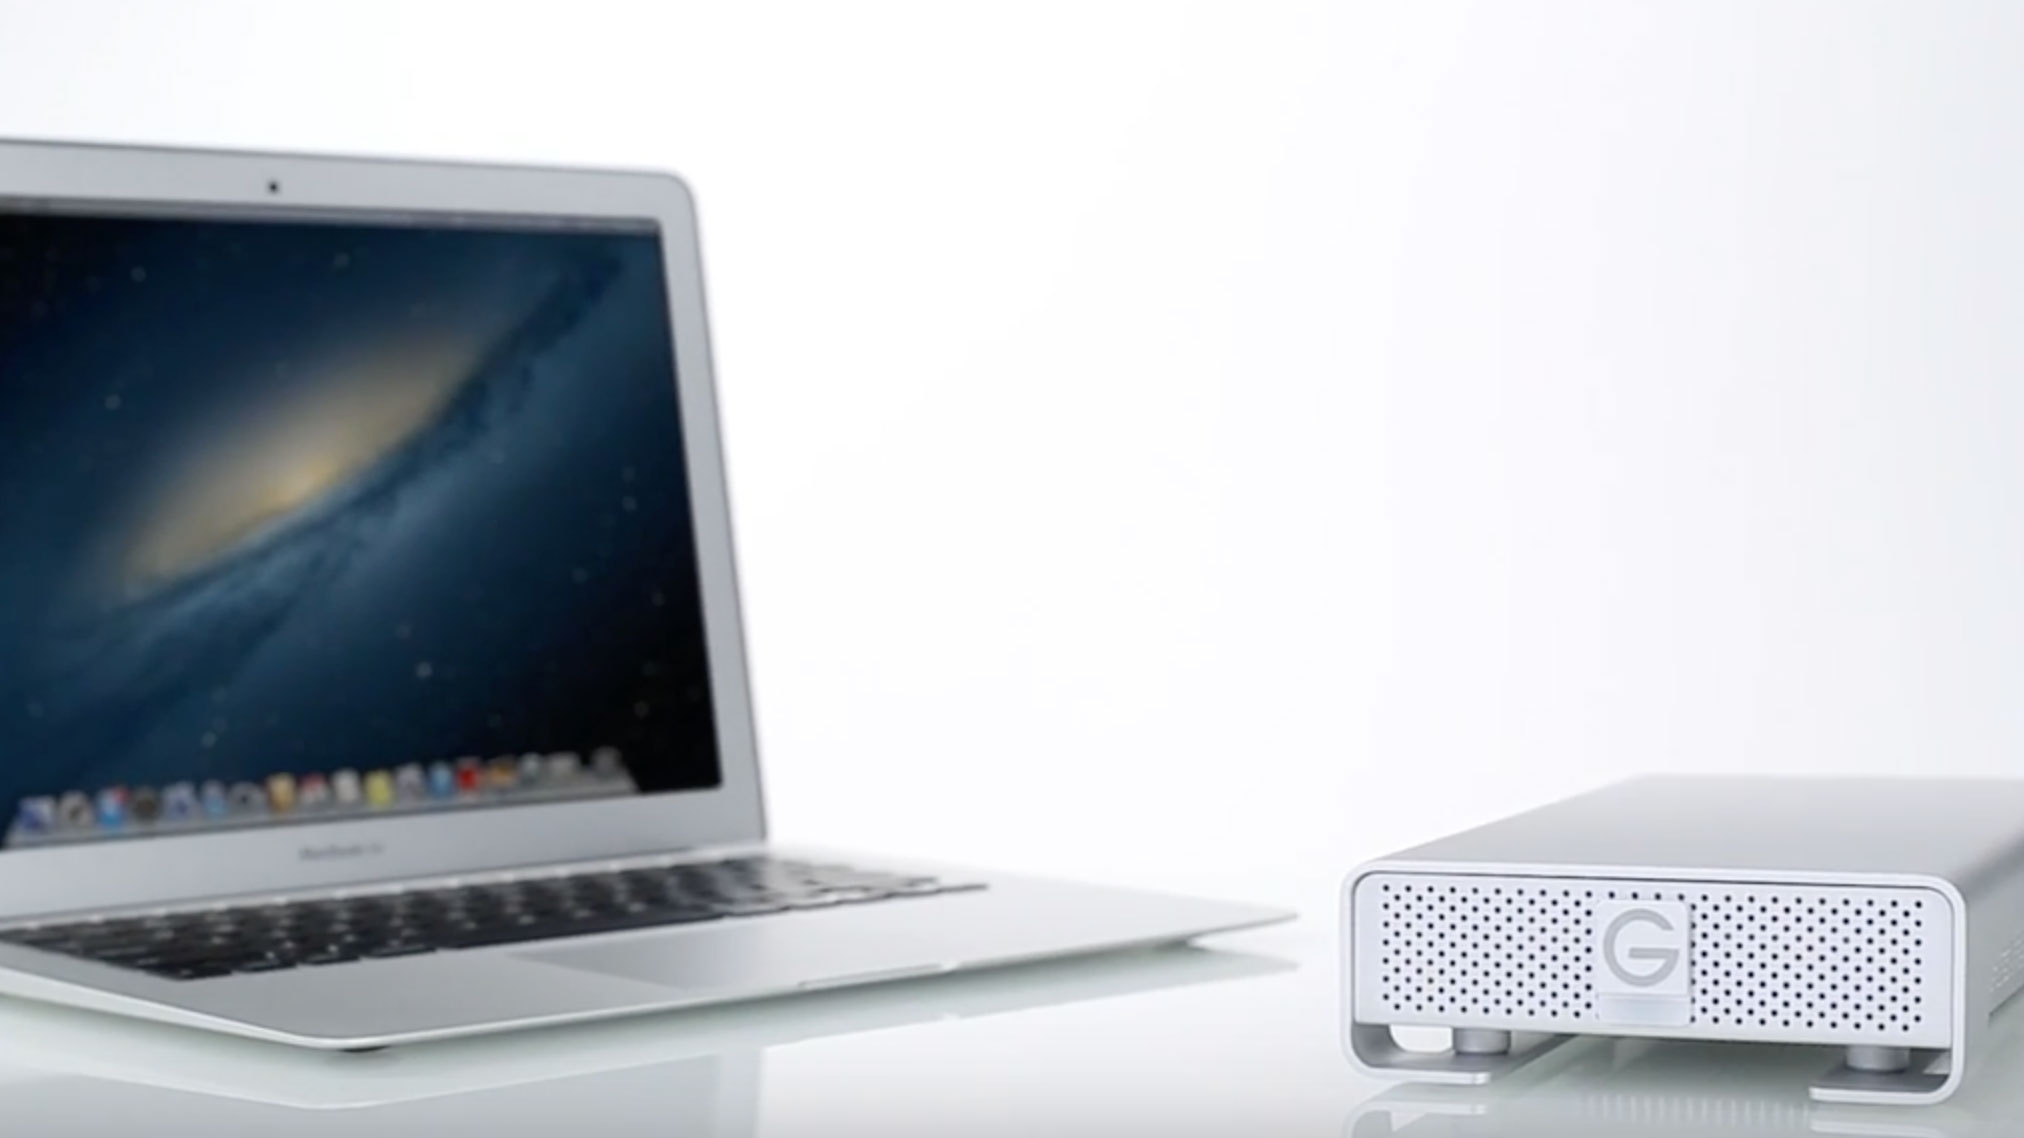
Earlier than you do something you need to again up or clone your Mac. It’s because – as you’ll anticipate – resetting a Mac to manufacturing unit settings removes all the information saved on that machine.
Don’t fall in to the lure we fell into: As a result of we use iCloud to sync all information throughout all our Apple gadgets we assumed that we may simply get better every part we wanted from the cloud – which was true to a sure extent, however it wasn’t till after we wiped the Mac that we realised that the information for one non-Apple app we used wasn’t within the cloud. In today of working predominantly within the cloud it’s a simple mistake to make! Sadly you possibly can’t back up everything on your Mac to iCloud.
Fortunately backing up your Mac is simple to do – so long as you will have a exterior laborious drive to make use of. This may be accomplished very merely utilizing Apple’s Time Machine software program – right here’s how to back up using Time Machine. The most effective factor about backing up with Time Machine is it makes it very easy to move your data to a new Mac afterwards.
When you don’t need to use Apple’s free Time Machine software program, or you can also make a clone of the entire laborious drive utilizing a program like Carbon Copy Cloner or SuperDuper (each can be found as free trials).
This cloned drive may be re-cloned again to the principle drive in case you resolve to revive your Mac, or it may be used to entry all the unique information and switch them and all of your settings to your new laptop.
We’ve got a whole information that explains how to back up a Mac in addition to this information to the best Mac Backup Software.
Erase your Mac (macOS Monterey or later)
Foundry
When macOS Monterey was launched in 2021 Apple added a brand new possibility in System Preferences (System Settings as of macOS Ventura) for wiping a Mac and returning it to manufacturing unit settings.
Due to this new “Erase All Content material and Settings” possibility, wiping your Mac as a way to move it on, promote it, or simply since you need to do a clear set up within the hope that it’ll repair points is kind of a easy course of. Nevertheless you will want to have a M1-series Mac, M2-series Mac, or a Mac with a T2 chip inside. It additionally must be operating both macOS Monterey or macOS Ventura.
In case your Mac is older then the steps you might want to take are a little bit extra difficult, we’ll run although the steps for older Macs under.
How you can erase a M1/M2 Mac, or a T2 Mac
The brand new possibility that arrived in macOS Monterey takes care of a number of the difficult steps concerned in wiping your Mac – so long as it’s an M1- or M2-series Mac or one with a T2 chip.
When you click on on the brand new Erase All Content material and Settings possibility then every part will likely be taken care of, together with removing of your saved fingerprints for Contact ID and something within the Pockets app, signing you out of your Apple ID, and turning off Discover My and Activation Lock. Bluetooth gadgets will likely be unpaired. It additionally removes all of the accounts and their information and any volumes you will have arrange on the Mac–so in case you share the Mac with another person do make certain their stuff is backed up too. It’s going to additionally delete any functions put in on the Mac.
To kick off this course of you might want to observe barely completely different steps relying on which model of macOS you’re utilizing:
In Ventura or later:
- Open System Settings.
- Click on on Basic.
- Select Switch or Reset.
- Choose Erase All Content material and Settings.
- Enter your password.
- Click on proceed.
In Monterey:
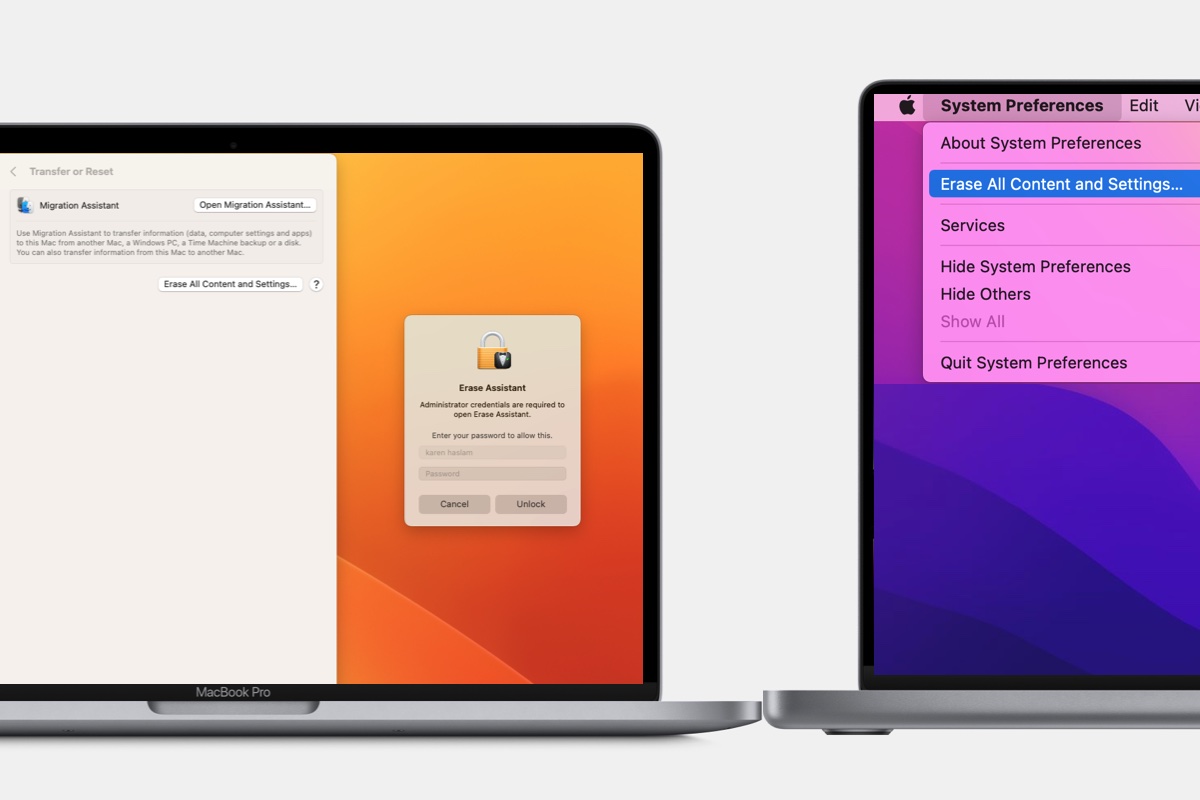
- Open System Preferences (System Settings if you’re utilizing Ventura).
- Click on on System Preferences within the menu bar on the high of your display.
- Click on on Erase All Content material and Settings.
- Enter your password.
- Click on proceed.
At this level you’ll be reminded to do a backup with Time Machine earlier than you start deletion.
A window will then present you what will likely be deleted, together with Apple ID, Contact ID, equipment, and Discover My settings.
Lastly you will want to sign off of your Mac and all associated providers utilizing your Apple ID.
Earlier than your Mac is erased you obtain a last warning, so if in case you have second ideas not less than you possibly can cease at this level!
Having clicked the second Erase All Content material & Settings your Mac will restart.
As soon as your Mac restarts you possibly can undergo the steps to set it up as new, or you possibly can depart it at this stage for the following proprietor to arrange. Simply flip the Mac off first.
Which Macs have a T2 chip?
Erase All Content material and Settings will work for Intel Macs which have the T2 safety chip, these embrace:
- MacBook Air from 2018
- MacBook Professional from 2018
- Mac mini from 2018
- iMac 27-inch from 2020
- iMac Professional
- Mac Professional from 2019
In case you have a Mac with a T2 chip you need to be capable to replace it to macOS Monterey, or macOS Ventura, and use the Erase All Content material and Settings possibility, which will likely be less complicated than the steps would in any other case be.
That’s it. In case you are fortunate sufficient to have a Mac with Apple silicon, or a Mac with the T2 chip that’s all you might want to do. In any other case transfer on to the following step.
Erase your Mac (Intel Macs with out T2 chip)
Apple
If you wish to wipe an older Intel-powered Mac that doesn’t have the T2 chip (see the record of Macs above) you’ll have a extra difficult journey to reset your Mac to manufacturing unit settings.
You will want to signal out of the varied providers you employ, deauthorise accounts, and unpair Bluetooth gadgets, earlier than beginning your Mac up in Restoration mode as a way to delete your information. We’ll run via every step under.
Signal out of providers
Foundry
you might want to erase the Mac earlier than you move it on, however earlier than you delete every part there’s some extra admin to do first.
Earlier than you start the method of wiping your Mac it’s value signing out of the next to keep away from complications in a while:
Signal out of Discover My: Open System Preferences and click on in your identify within the Apple ID/iCloud part. Scroll all the way down to the Discover My Mac part and click on on Choices. Click on on Flip Off beside Discover My Mac and Fins My community.
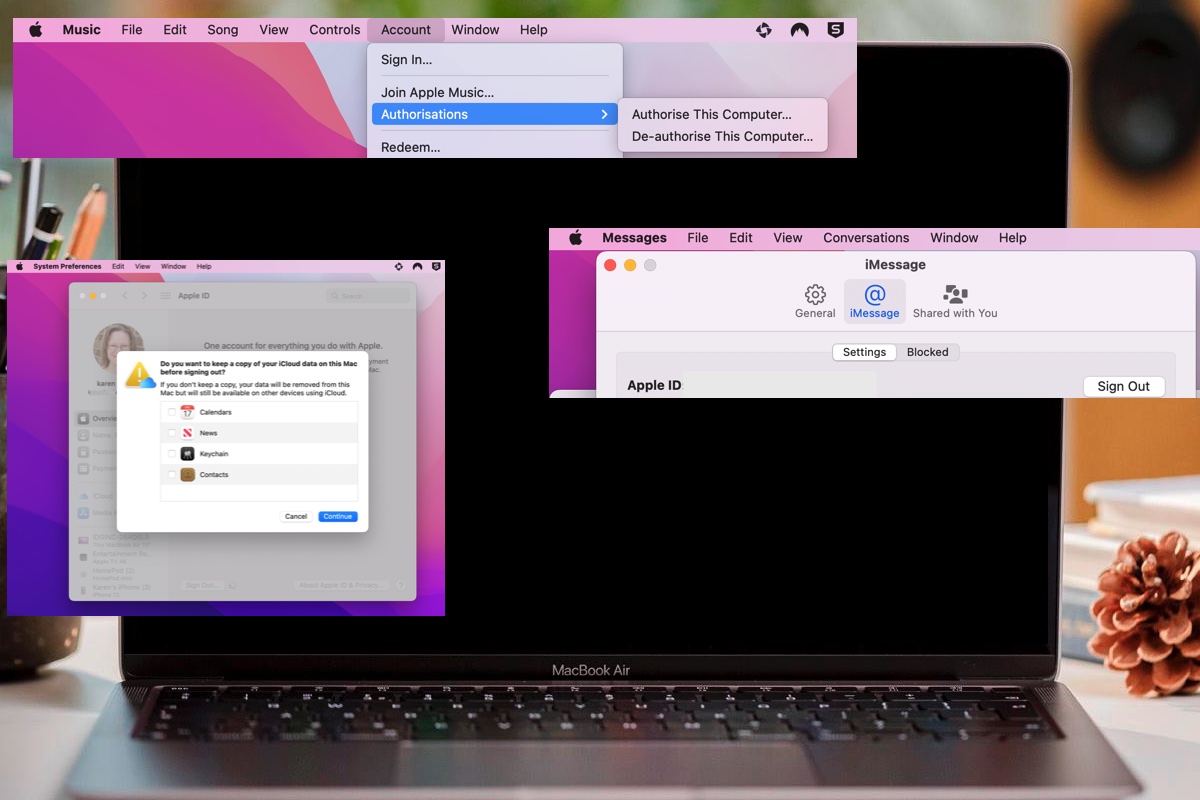
Signal out of iMessage: Open Messages in your Mac and click on on Messages within the menu bar. Click on on Settings/Preferences > click on on the iMessage tab > Signal out.
Signal out of your Music/iTunes account: You will want to deauthorise your Apple Music and/or iTunes Retailer account and sign off. That is essential as a result of you possibly can solely use as much as 5 Macs to play music which are locked to your account. Open the Music app > Click on on Account > Click on on Authorisations > De-authorise this laptop. Then click on on Account > Signal Out.
Signal out of your TV account: As with the Music app you will have a restrict to the variety of gadgets that may play films you will have purchased from the iTunes Retailer, so you need to signal out of your account within the TV app. Open the TV app > Click on on Account > Click on on Authorisations > De-authorise this laptop. Then click on on Account > Signal Out.
Signal out of iCloud: Open System Preferences and click on in your identify within the Apple ID/iCloud part. Then signal out. When it asks if you wish to make a copy of the iCloud information simply deselect every part (in fact ensure you again that info up someplace). Then click on Proceed and anticipate it to signal out (which can take some time). When you use iCloud Picture Library you’ll be requested if you wish to obtain pictures to the Mac (you don’t except you need to make a again up of this cloud based mostly library). Lastly enter your Apple ID Password to verify, and enter the password for the Mac.
One other solution to be completely positive that none of your private settings stay on the Mac is to reset the NVRAM. We focus on how to try this right here: How to reset the NVRAM, PRAM, and SMC on any Mac.
Unpair Bluetooth gadgets
Apple
It’s additionally a good suggestion to unpair your Bluetooth gadgets. That is particularly essential if you’re passing your Mac on to somebody in your house or workplace as any Bluetooth gadget that will have as soon as been paired along with your previous Mac might hook up with the previous one once more
- Open System Preferences > Bluetooth.
- Unpair your gadgets.
Simply bear in mind you will want your mouse and keyboard for the following steps so plug them in in case you can.
Flip off FileVault (in case you use it)
Apple
FileVault encryption could make it troublesome for unauthorized individuals to entry the information in your Mac. In case you are utilizing FileVault to encrypt the information in your Mac you need to flip it off earlier than you delete your information and put together the Mac on the market–this appears illogical as you need to defend your information, however you can be eradicating the information so there’s nothing to guard, however, extra crucially, in case you depart FileVault on the one who you move your Mac to would wish to enter your password to unlock the disk earlier than they will arrange the Mac.
Right here’s tips on how to flip off FileVault:
- Open System Preferences.
- Click on Safety & Privateness.
- Click on on FileVault.
- Click on on the lock and enter your identify and password.
- Click on Flip Off FileVault.
Restart your Mac in Restoration (Intel Mac)
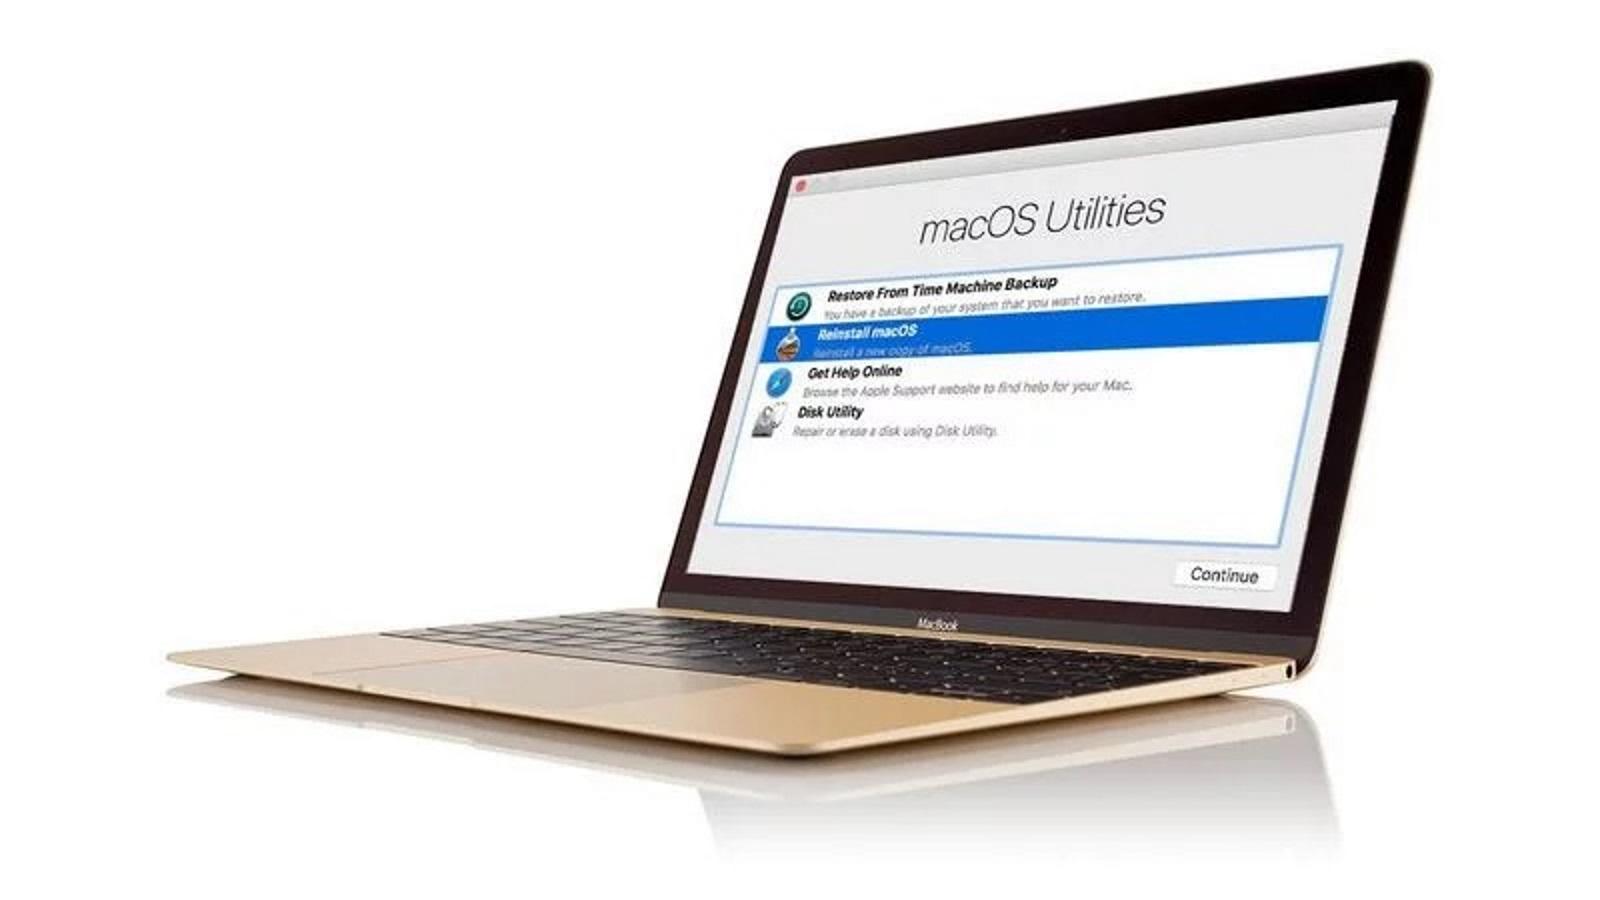
Foundry
Now you will have backed every part up, deauthorised your accounts and unpaired gadgets, you’re able to begin to erase every part on the Mac. To take action you might want to enter Restoration mode. It will allow you to wipe the Mac.
We’ll element tips on how to enter Restoration mannequin on an Intel Mac right here, the method is completely different on M1 and M2 Macs, however you gained’t want this step in case your Mac has an Apple chip. (If you wish to know how to get to Recovery on a n M1 or M2 Mac we run via that in one other article.)
How you can enter Restoration on a Mac with an Intel processor
- Click on the Apple emblem on the high left of the display and choose Restart.
- Instantly maintain down the Command and R keys till you see an Apple emblem or spinning globe. (It’s possible you’ll be higher off utilizing a special key mixture relying on the age of your Mac, and which macOS you need put in or was put in on the Mac once you purchased it – we have now a complete guide to starting a Mac in Recovery Mode here). For instance, Apple recommends that “in case you’re promoting or freely giving a Mac that’s utilizing OS X El Capitan or earlier, use Possibility-Command-R to make it possible for the set up isn’t related along with your Apple ID”.
- Count on it to take some time for the Mac to start out up on this mode.
- You might even see a display asking you to decide on a language.
- The subsequent display you’ll see is the Restoration Mode Utilities window.
Erase and reformat your Mac (Intel Mac)
Foundry
Now you will have entered Restoration you possibly can erase your Mac.
Once more, the directions are a little bit completely different relying on the model of macOS you’re utilizing and whether or not your Mac is Intel or M1.
We’ll run via the strategy in Monterey, Large Sur and Catalina, earlier than shifting onto Mojave and former variations of macOS under that.
How you can delete your Mac in Large Sur/Monterey
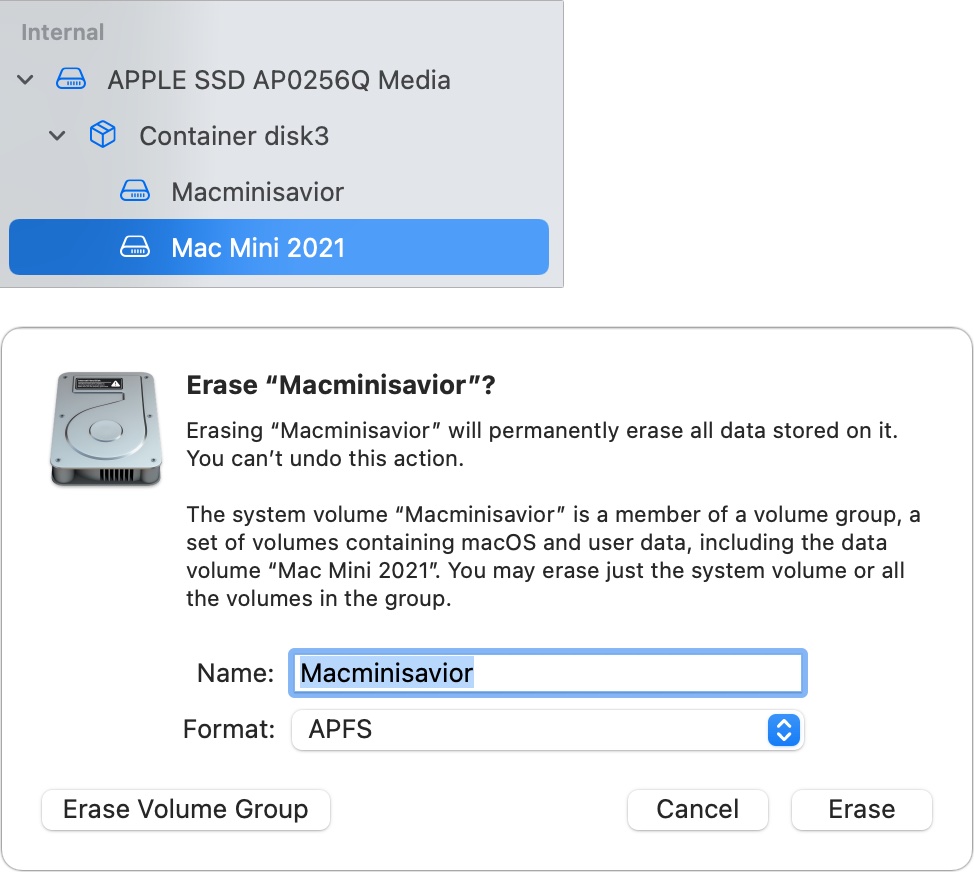
- Now that you’re in Restoration, as per the directions above, you might want to choose Disk Utility from the record.
- As soon as in Disk Utility choose Macintosh HD (or no matter you will have known as your ‘laborious drive’).
- There are numerous choices alongside the highest: click on on Erase.
- You must see the identify of your drive and the format must be APFS. Beneath you need to see an choice to Delete Quantity Group (this can make sure you delete each the Macintosh HD and Macintosh HD Information.)
- After getting deleted the Macintosh HD you possibly can then click on on another drives and volumes and click on the – to delete the amount.
To ensure you delete every part you will want to decide on Erase Quantity Group, in case you don’t see this feature attempt the directions under.
We’ll element tips on how to delete your Mac in Catalina and Mojave on the finish of this text as the method is barely extra difficult.
Reinstall macOS
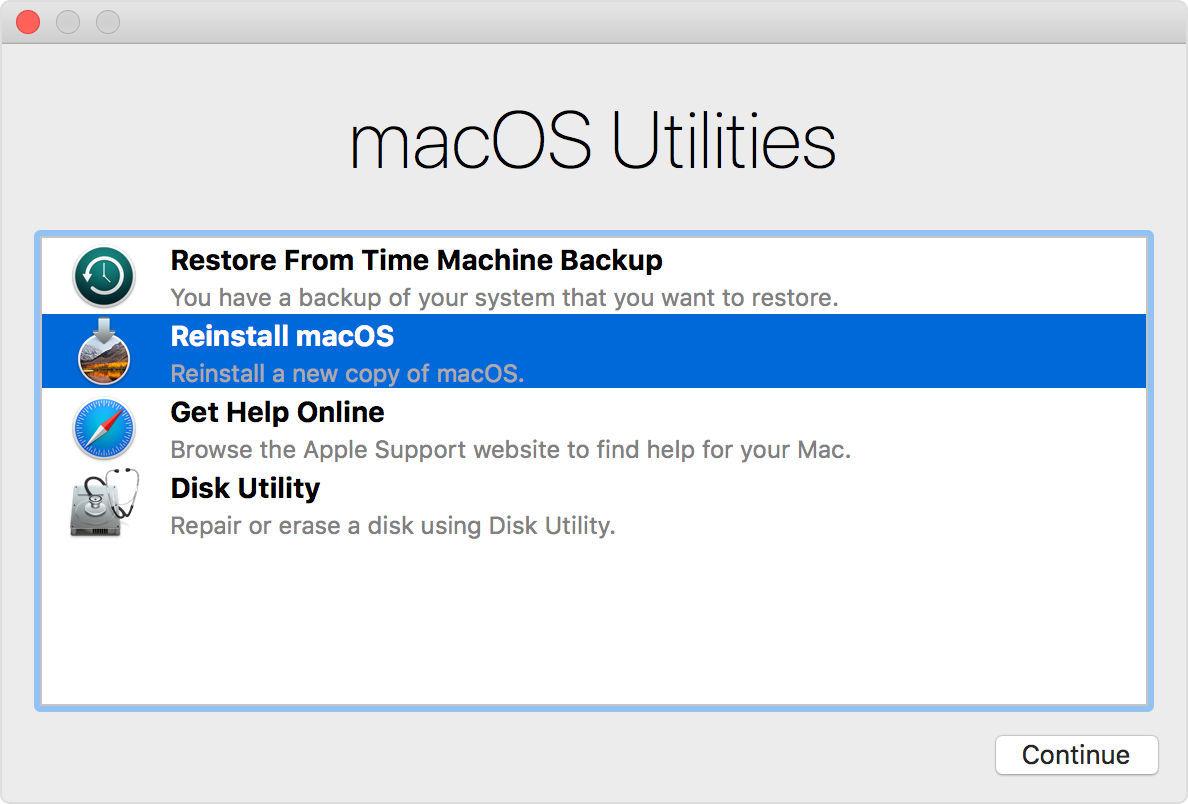
Foundry
The subsequent step includes reinstalling macOS–you possibly can’t simply promote your Mac having erased the contents, in case you do the brand new person will likely be confronted with a flashing query mark once they begin up the Mac as a result of there will likely be no working system put in. You have to reinstall macOS earlier than you possibly can promote it on.
In case you have an M1 or M2 Mac, or a Mac with the T2 chip, this will likely be dealt with by the Erase All Contents and Settings possibility in System Preferences, as detailed above. But when that isn’t an possibility for you then the under information ought to assist:
How you can reinstall macOS
Whether or not you’re reselling the Mac, or simply planning to proceed to make use of the Mac and simply needed to do a clean install you’ll want to set up a model of macOS.
You must nonetheless be in macOS Utilities in Restoration Mode as per the steps above.
- Select Reinstall macOS from Utilities and observe the directions that seem to reinstall macOS.
- Your Mac will begin to obtain and set up which ever model of macOS your Mac was operating – alternatively, in case you needed to install an older version of macOS we have more information below.
- Ultimately after the longest-ever 49 minutes or so your Mac will restart. However the wait isn’t over. It’s going to nonetheless take some time whilst you begin up and watch the white bar. Ours mentioned 11 minutes remaining round that point, however it took lots longer than that. Simply depart your Mac to get on with it and ignore any time remaining indicators.
- Lastly you will notice the Welcome display. In case you are promoting or passing in your Mac you possibly can depart it at this stage as a result of the brand new person might want to enter their particulars. If you wish to proceed to make use of the Mac then observe the steps to set it up.
How you can set up an older model or downgrade macOS

Foundry
The strategy above will work if you wish to set up the most recent model of macOS put in on the Mac. It gained’t improve you to the most recent model in case you aren’t already operating it.
There are different choices if you wish to set up a special model of the macOS.
As an alternative of urgent Command + R at begin up you could possibly press Shift + Possibility/Alt + Command R (if you’re operating Sierra 10.12.4 of later) to put in the model of macOS that got here along with your Mac, or the one closest to it that’s nonetheless out there. (Command + R gained’t work on an M1 Mac).
Alternatively you could possibly make a bootable drive containing the model of macOS that you simply need to run and set up it in your Mac utilizing that. Learn how to try this right here:
How to make a bootable macOS installer on an external drive.
If you might want to set up an older model of the Mac working system and are questioning how you are able to do that in case you haven’t obtained the unique discs, learn this:
How to install old versions of macOS or Mac OS X.
We’ve got one other article that goes into extra element on how to install an older version of macOS using Recovery mode.
Deleting your Mac in Catalina, Mojave and earlier
As promised above, listed here are the steps to observe if you wish to delete your Mac in macOS Catalina or older.
We’ve got extra steering right here: How to erase a Mac’s drive in macOS Catalina, Big Sur, or Monterey.
How you can delete your Mac in Catalina
When Apple launched macOS Catalina in 2019 it added a brand new read-only quantity the place the working system lives. This quantity is Macintosh HD (yours might have a special identify). Alongside it additionally, you will have a Macintosh HD – Information quantity. That is the place your information resides.
The rationale Apple separated the 2 volumes in Catalina is to make sure that vital working system information can’t be overwritten. Due to this further quantity the method is a little bit completely different to the way it works on older Mac.
- As per the steps above begin up your Mac in Restoration.
- As soon as Restoration begins up select Disk Utility.
- You must see two disks – Macintosh HD and Macintosh HD – information (proven under – sorry about picture high quality!) This information drive is the place your information is saved individually to the macOS set up. (It’s doable your drive known as one thing else, like Residence HD for instance).

- Click on on this Macintosh HD – Information drive to pick it.
- Both click on on the – button or go to the menu and select Edit > Delete APFS quantity.
- You will note a message warning you that this can completely erase your information. Click on on Delete.
- Wait whereas the amount is deleted.

- Now you might want to return to Disk Utility to delete the Macintosh HD. You need to do each steps as you gained’t simply be capable to reinstall macOS excessive of macOS. And you will want to reinstall the macOS with a view to recreate the Macintosh HD-Information quantity. Click on on Macintosh HD to pick it.
- We suggest that you simply click on Unmount. Initially once we tried to delete Macintosh HD we noticed an error message that said: Erase course of has failed as a result of quantity Macintosh HD on disk 2s5 couldn’t be unmounted as a result of it’s in use by course of 793 (kextcache). Unmounting first fastened this downside.
- With Macintosh HD nonetheless chosen click on on Erase.

- Enter a reputation you need to give the drive after you have reformatted it, corresponding to Macintosh HD.
- Select the format. That is will likely be APFS if you’re utilizing Catalina – older OSs might need had the choice of Mac OS Prolonged (Journaled).
- Click on Erase and enter your Apple ID if required. Wait.
- Now give up Disk Utility to return to the MacOS Utilities display.
How you can delete your Mac in Mojave or earlier
The method for deleting and reformatting your Mac is barely easier in macOS Mojave or earlier as there isn’t the second Information quantity to delete first.
As above, begin up in Restoration.
- Choose Disk Utility from the choices, and click on Proceed.
- Click on in your fundamental laborious drive, sometimes known as Macintosh HD, within the sidebar on the left. You’re in search of the disk identify, not the amount identify indented beneath it if that seems.

- To wipe your laborious drive, click on the Erase button, then click on Erase. Word that this completely erases all information on the laborious drive so don’t do that except you’ve cloned the drive or are joyful to by no means entry something on that drive once more.

- When it’s completed, exit this system by going to the highest menu and choosing Disk Utility > Stop Disk Utility.